I struggled to find a subject for this week’s challenge and then I saw my son’s guitar and thought it should look cool. Line effect by Befunky.
– Georgina Lawrence
r
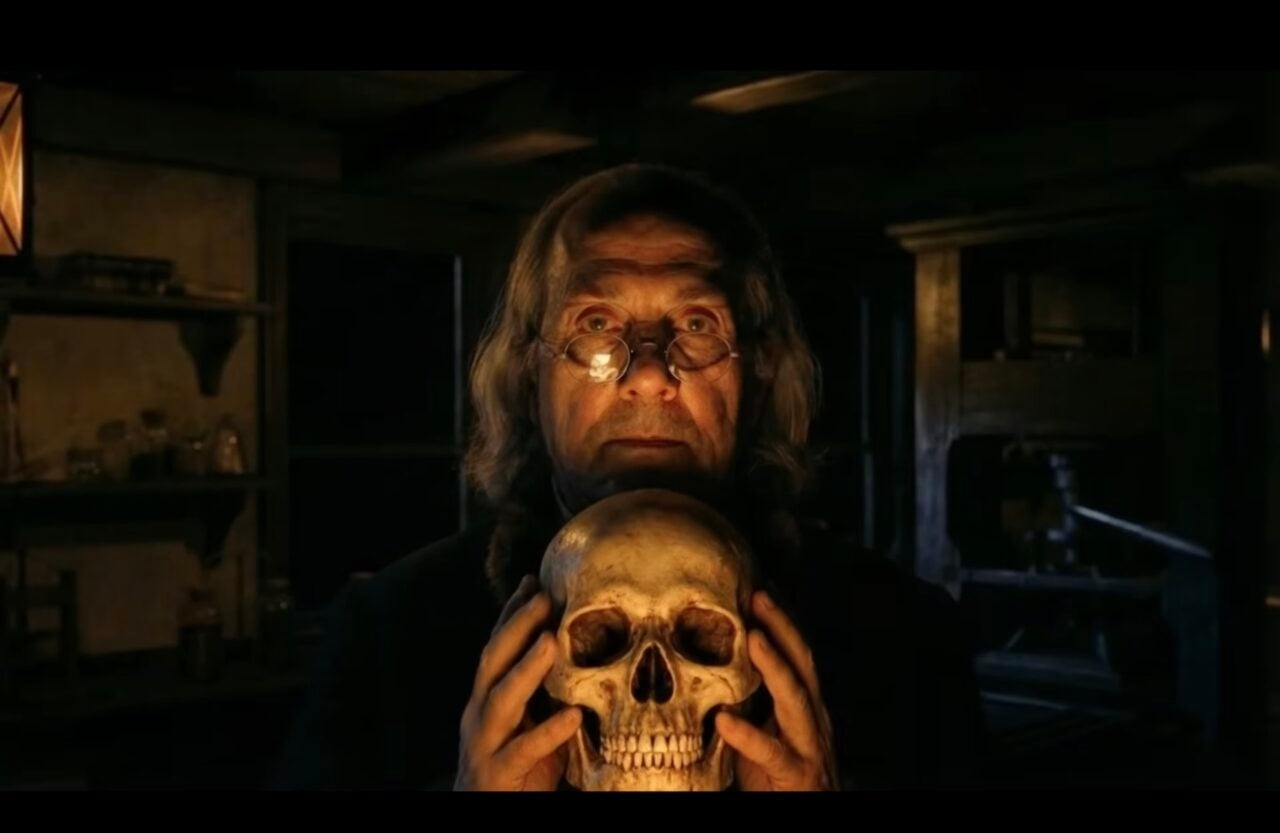
Summary: Nikon D700; Nikkor 50mm 1.4; Shot at F45 and 640 ISO.
Story: Wasn’t sure what to do with this one. Decided to drag a heavy mirror outside and do a self portrait. Could have done this inside but I wanted some natural light. I spent a good deal of time doing different ink effects in Photoshop and with the help of AKVIS Sketch and a good deal of layering came up with this. My first few tries had the entire photo in color but it didn’t quite look right so I went black and white. After more fiddling, I decided I wanted some of the photo to be “real” so I cut the center out of two of my layers and did some eraser tooling to make it look like my legs came out of the sketch. Thanks for the fun time Gizmodo.
– Mark Barton
Hi I used an xperia ray 8mp smartphone in order to take the
photograph. I cannot supply the iso etc due to it being shot on a
smartphone but as far as I am aware it was an exemor lens. I relied on
a strong natural lightsource supplemented by artifical lighting in
order to achieve a good balance between the light and dark which would
be needed for my image. I used artifical lighting in order to achieve
a clean shadow formation on my subject in order to more easily apply
an inked look.
I decided to take a shot of my partner as he was always unwilling to
be a model for me but when I explained the picture wouldn’t show “him”
took it at this angle in order to emphasize his previous unwilingness
to be a model and decided to play up on this in order to create a more
dynamic shot.
– Eulich McGeown
I took this pic on my morning walk in the park. I used my Canon powershot S95, set it up on aperture priority of f/5.6; ISO of 80; 18mm focal length;and shutter speed of 1 sec.
– Ave
I figured for this challenge animated characters would be a great subject. I positioned and lit my Kid Robot Gorillaz vinyl figures then shot with my Sony SLT-33A with the kit lens and the posterize setting, yeah, it’s cheap but it definitely meets the requirements of this challenge. What you see is hat you get, all in camera.
-Felonious Max
Camera: Panasonic Lumix GF1 with Pancake 20mm 1.7 lens
ISO 100
Vivitar flash bounce
I took this photo of myself in my room. Enhanced contrast and nothing else too special, then followed the provided tutorial. This is my first attempt of anything like this. I must say though, I found myself getting addicted a little and could easily spend several more hours playing with different brushes and tools I’ve never used before. Thanks for another educational challenge! These things introduce me to aspects of Photoshop and post processing that I would probably never experiment with.
-Aaron
Hi Gizmodo,
I took this into Photoshop and immediately applied a Find Edges filter…. and I just loved it. I was only intending on using the filter to test the image- I figured if it looked good it would be worth vectorizing. Then I selected the black lines and created a work path. I filled the path. I stroked the path. I changed the value of the path from its default 2 down to 1. Getting nowhere. I threw all that away and changed the range of the selection, made a new path… still not happy. It just looked ‘generated’. I looked at the initial test- the Find Edges filter. I played with the saturation and contrast a bit, and called it a night. To me it has a nice colored pencil look (without going so far as to use the Colored Pencil filter, which IMHO would look cheesy). I suppose I could hand-draw the vector paths and have more control over the selection, but with an image like this I’d be here all night… oh well, here goes.
Shot from the window of a hotel in San Francisco.
Canon Powershot A700
Julian De Puma
“Pelican”
Fujifilm s100fs — F5.3 — 1/320″ — ISO100 — 102mm
I used GIMP for the post processing. I desaturated the image to remove the color. Then, I blurred the image to reduce the number of small edges in the image. Next, I ran the standard edge-detect filter. Finally, I inverted the color to produce a black-on-white image.
– Mike Case
“Incomplete”
Canon T2i, 100mm, f2.8. Partially edited (mad men style) in Photoshop CS4.
-Diego Jimenez
Hello,
Here is my pic. I shot it with a Olympus SZ-12, at f/6.9, ISO-125 with a 95mm focal length and did the post work in GIMP 2.
My wife and I were hiking up Mount Disappointment north of LA, when we saw this butterfly at the top in a bush. The was the only good shot of the day. The views of the Glendale was hazy, and Downtown was just a vague outline in the distance, so this shot was the only good thing I shot all day. Rather than ink the entire image, I decided to just do the butterfly, because it makes it look so much more like I pasted a B/W image on top of a background.
-Jeff
Here’s my entry for the Inked Challenge:
I set up a flower in front of a white sheet of paper. I used a Canon 60D and 24-105 lens zoomed all the way in at f/6.3, 1/200sec, and ISO 160. I used a Lumopro 160 flash camera left a little behind the flowed and a Lumiquest SB-III softbox, and a large window was directly to the right. I brought the image into Photoshop and converted it to black and white. I then ran it through a high-pass filter to find the edges and used the graphic pen filter to convert it to line art. The image was black with white lines, so I inverted it to get the line drawing.
Joe
It was a pleasant day in the park, and I caught someone doing yoga.
Sometimes, it’s all about timing. I thought of creating a glowing orb
above him, to make it appear he is under some supernatural power, and
to dim the background a bit in photoshop. His pose was perfect. I
created the orb in photoshop, and used a pre-made filter, Poster
Edges.
– Stacy
Canon EOS REBEL T3i
ISO 400
Aperture f/4
Exposure 1/30th
Focal Length 18mm
18-55mm lens
My super awesome boyfriend – who happens to be the best music producer in Toronto – sent me the link to your contest and I thought it would be fun to participate. But in all seriousness, I took this shot as a self portrait and to recreate it through other mediums such as line art (for this contest), acrylic painting, sketching, and mixed media.
– Isabel
Canon T2i
ISO 100
1/50 sec
F~4.0
Took the picture of myself, made line art.
– Paul
Hello,
Camera used – Sony Experia Arc(cell Phone)
Image editing software –Gimp
Location – Farmhouse on the outskirts of Mumbai
This is picture of us at a friend’s farmhouse. It’s about 100 miles from Mumbai. The juxtaposition of mechanics and nature was just a sight for sore eyes, especially after a week of work.
Regards,
Bosco Pereira
I took a friend in the studio recently and inked him after i saw the contest. You guys perviously discovered my work I am the artist behind the batman light minting.
My name is Matthew Barhoma from California Los Angeles
Taken with iPad2, drawn over and painted with SketchBook for iPad and sized images with Photoshop Touch. And then sent via mail app for iPad.
-Rene
Tools: iPhone 4 front facing camera, Wacom Cintiq.
Technique: Illustrating over the photo in Photoshop.
Story: I took a quick snap miming punching myself in the face using the front facing camera to better frame the shot. Since the point was to make an illustration based off the photo, the quality didn’t matter as much as the pose. Once I had the pose I was looking for, I imported to Photoshop, and set the photo layer to about 30% opacity, and drew with the pencil tool over the image using the Cintiq. I then used the lasso tool to select areas for shading, and filled in with a sponge textured brush, using the eraser tool to soften the edges, and applied a color halftone filter. I added a few illustrative flourishes like the drool, the white outlining, and the motion lines to emphasize the punch.
Clay Yount